I’m going to be honest with you right from the start: there is no such thing as a DIY pool sun shelf kit.
I know because I’ve spent the last twelve years managing pools for resorts and HOAs across Arizona, Nevada, and Southern California — and I’ve fielded this question at least fifty times. Someone searches for a quick weekend retrofit, finds a bunch of results that look promising, and then discovers that none of them are what they actually wanted. It’s frustrating. I’d rather tell you the truth upfront than have you waste a Saturday chasing a product that doesn’t exist.
Here’s what I’ve learned: the underlying desire — a shallow, sun-warmed spot where you can recline in the water — is completely real and totally achievable. It’s just not achieved the way most pool owners hope. And in this post, I’m going to explain why, and then show you the actual solution that works without construction, without draining your pool, and without a five-figure invoice.
Why This Problem Is Worse Than You Think
Let me walk you through what happens when someone actually tries to retrofit a sun shelf into an existing pool, because understanding this is the key to understanding why no DIY kit exists — and why settling for the right alternative is actually the smarter move.
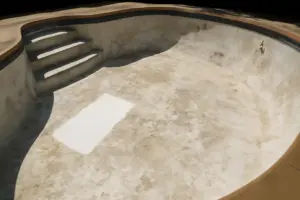
A true sun shelf — also called a Baja shelf or tanning ledge — is a structural feature of the pool itself. It’s typically 6 to 12 inches of water depth, sized roughly 6 by 8 feet or larger, with a flat, finished surface designed to withstand foot traffic, lounging, and constant submersion. When a pool is new, adding a sun shelf costs nearly nothing because it’s just a different shape of the same concrete pour. The contractor forms a shallow platform into the gunite or shotcrete shell during initial construction — same labor, same crew, different geometry.
But retrofitting one into an existing pool is an entirely different animal. Here’s what that actually involves:
- Draining the pool — the entire thing, which means you’re out of commission for weeks
- Cutting into the existing shell — jackhammering or sawing into concrete or plaster you’ve already paid for
- Structural concrete work — adding rebar, forms, and new gunite to build the shelf platform
- Full replastering — not just the shelf area, but often the entire pool, because color-matching a patch job is nearly impossible and looks terrible
- Re-plumbing — if there are any returns, lights, or drains in the section where you’re building, those need to be relocated or rerouted
- Permitting and inspections — in most jurisdictions, structural pool modifications require permits
The labor timeline alone is 1 to 3 weeks of skilled trade work. The cost? I’ve seen it range from $3,000 to $15,000 or more, depending on your pool size, finish complexity, and whether you need replastering. I managed a resort pool retrofit last year that ran $8,500 just for the concrete and plaster work, plus another $2,000 for re-plumbing returns.
There’s no version of this job that arrives in a box. There’s no weekend DIY retrofit because the job is structural, not superficial. Any product claiming to be a DIY sun shelf kit or an “add sun shelf without construction” solution isn’t retrofitting a real shelf — it’s just selling you something else and using that language to catch search traffic.
But here’s the thing: most pool owners don’t actually need a permanent structural shelf. What they want is the experience of lounging in shallow, sun-warmed water. And that — that you absolutely can have without a contractor.
What to Look For in In-Pool Ledge Lounger Furniture
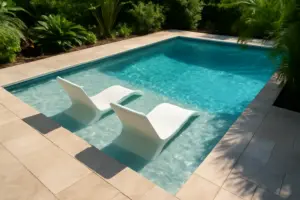
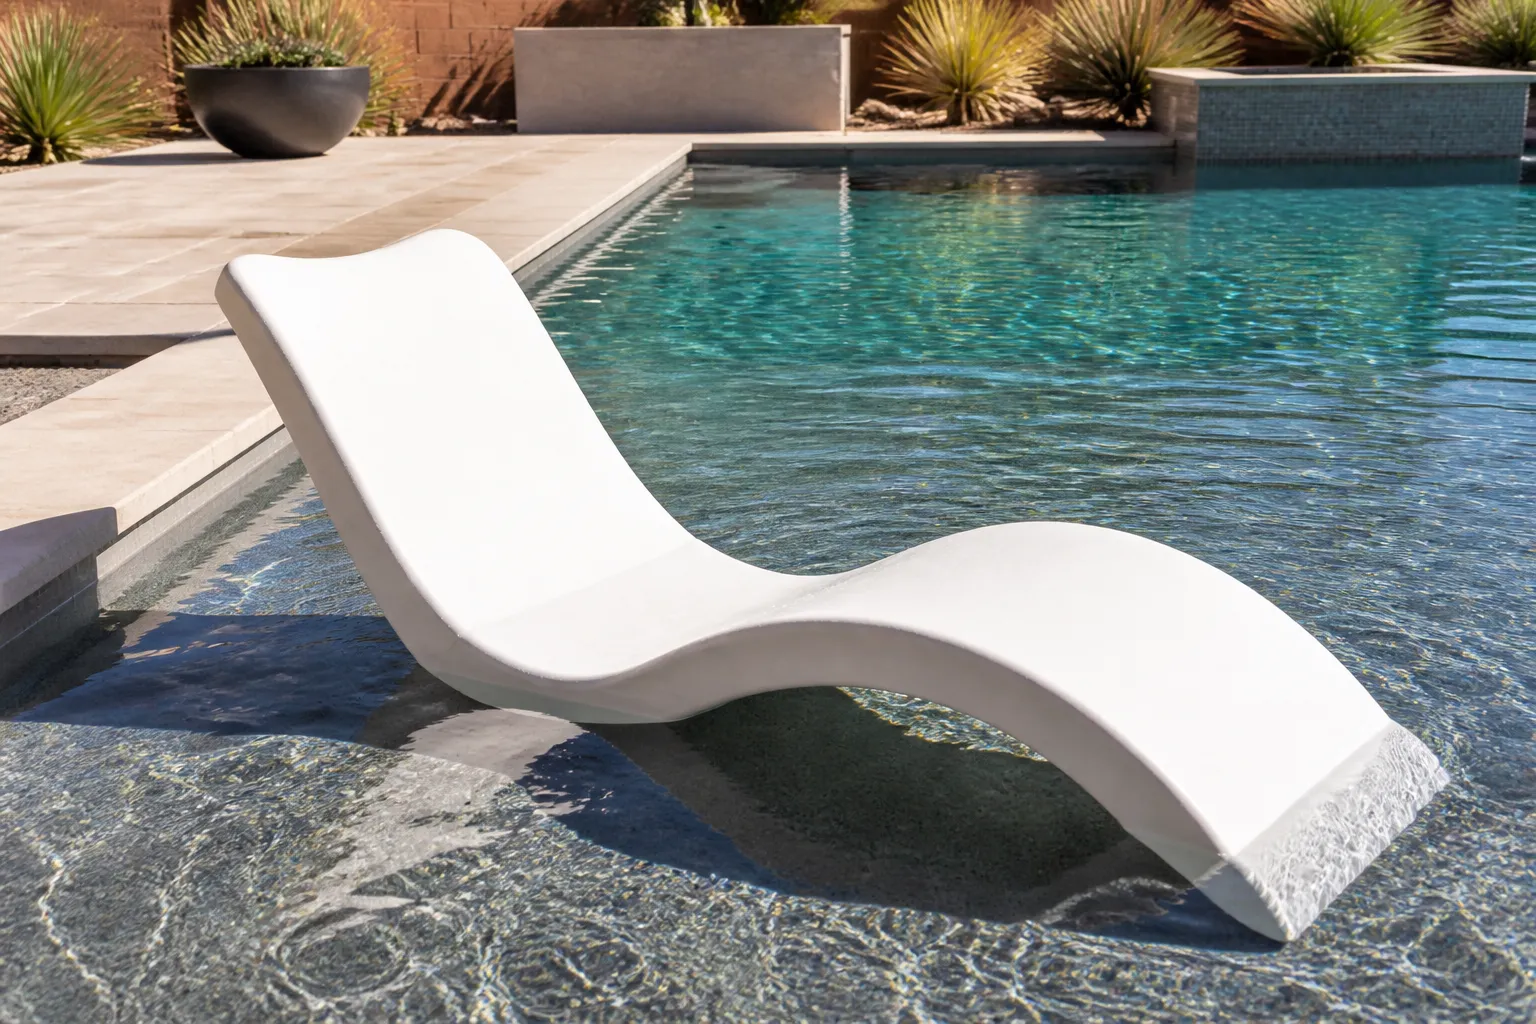
The answer to “I want a sun shelf but don’t want construction” is in-pool ledge lounger furniture — purpose-built, weighted chaise lounges designed to sit submerged in 6 to 12 inches of water on your pool’s shallow end, steps, or flat floor section. You get the actual experience people want from a sun shelf without touching the pool structure. No draining, no permits, no contractors. Order it, unbox it, set it in the shallow end. Done.
I’ve been using quality ledge loungers on resort and community pools for years, and I’ve also seen cheap ones fall apart or float away after one season. Here’s what separates the good from the worthless:
Material and UV Stability
Look for solution-dyed, UV-stabilized resin — typically polypropylene or a similar engineering plastic rated for permanent submersion and constant sun exposure. This matters way more than people think. Cheap outdoor furniture repurposed for pool use — the kind you’d buy at a big-box store for a backyard patio — will fade dramatically, crack along the seams, and often lose structural integrity within a single season of full-time water exposure.
Good in-pool furniture has UV inhibitors built into the material itself, not just a surface coating. The color should be dyed all the way through. When you sit on it wet, in direct sun, 200 days a year, cheap plastic doesn’t stand a chance.
Weight and Anti-Float Design
A genuine in-pool lounger has a low center of gravity and is either built-in weighted or engineered so that water channels through the frame in a way that prevents floating or tipping when someone sits down. I cannot stress this enough: furniture that isn’t purpose-built for submersion will bob, drift, and become a hazard.
I once watched an HOA put regular outdoor lounge chairs in a resort pool “to save money.” Within a week, they were blocking returns, drifting into the deep end, and one nearly trapped a child. We pulled them out immediately. Purpose-built loungers have weighted bases, contoured designs that channel water flow, or internal ribbing that keeps them seated firmly on the pool floor.
Drainage Holes and Water Flow
The seat and back should have drainage holes that let water pass through freely, not pooling in basins or crevices. Stagnant water trapped in a lounger seat becomes an algae farm and a staining magnet. Good designs have perforated seats, contoured bottoms, and openings in the frame that keep water moving rather than settling.
The Product That Does This Right
The Tenjam Shayz in Pool Lounge Chairs for Sun Shelf Set of Two is built specifically for this application, and it shows. The loungers are solution-dyed polypropylene with UV stabilizers rated for permanent submersion. They come with custom-designed risers that support up to 17 inches of water depth — meaning they’ll work in shallow areas where water level varies seasonally. The frame has integrated drainage and is weighted to stay put even when someone sits down and shifts weight. They’re available in multiple made-to-order colors, so you’re not stuck with basic white or gray.
What I like most: they’re stackable for off-season storage (critical if you winterize in a freeze climate), and they’re designed as a set of two, which means you’re getting matching pieces that work together on a flat section. The risers adjust the depth they sit at, so if your shallow end isn’t perfectly flat or your water level fluctuates, you can dial them in.
One honest limitation: these loungers still need a reasonably flat, unobstructed pool floor or step landing. If your shallow end slopes steeply into deeper water, or if it’s directly over a drain or return, placement gets tricky. But in my experience, most pools built in the last 20 years have at least a 6-foot section of relatively flat shallow water — that’s your zone.
Footprint vs. Your Shallow End
Before you order, measure your actual shallow-end depth and flat floor area. Most quality ledge loungers need 6 to 14 inches of water and reasonably flat terrain. Check for obstacles — some pools have sun steps, light niches, or drain covers right where you’d want to place loungers. Walk your shallow end and mark out roughly where a 3-foot-by-6-foot lounger would fit without conflict.
How to Use It Like a Pro
Once your loungers are in the water, there are a few moves I’ve learned from managing commercial pools that’ll get you the best result and the longest product life:
Placement Is Everything
Place the lounger where it gets the most consistent afternoon sun, not just where the depth happens to be right. I’ve seen plenty of loungers set up in a shaded corner because “that’s where the shallow water is,” which defeats the entire purpose. You want afternoon warmth — 2 p.m. to 5 p.m. sun exposure is ideal for actual comfort. Walk your pool in mid-afternoon and see where direct sun hits the shallow end for the longest stretch. That’s your spot.
If your shallow end doesn’t have a flat 6- to 12-inch section, check your pool steps. Many modern designs have a flat landing that’s shallow enough to work with a lounger when the legs are partially submerged. This isn’t quite as good as a true shelf, but it’s close enough that the lounging experience is still solid.
Cleaning and Off-Season Storage
Rinse your loungers with fresh water once a week, especially if you live in a high-mineral or hard-water area. Calcium deposits and mineral staining stick to polypropylene just like anything else. A soft brush and garden hose takes five minutes and keeps them looking new.
In freeze climates, pull loungers out and store them indoors during winterization. Even UV-stable resin can become brittle from repeated freeze-thaw cycles if left in standing pool water. Drain them completely and keep them in a garage or storage area during winter. It adds maybe 10 minutes to your closing procedure but extends the life of your furniture by years.
Working Around Your Automatic Cleaner
If you use a robotic pool cleaner, pull the loungers out before running a cleaning cycle. Bulky furniture in the shallow end is a common snag point for cleaner wheels and bumpers. One tangled robot in a lounger frame and you’re calling for service — just pull them out, run your cleaner, and replace them after. It’s quick and saves headaches.
Pairing It With the Rest of Your Routine
In-pool loungers integrate pretty smoothly into most maintenance routines, but there are a few chemistry and scheduling considerations worth knowing about:
Sunscreen, Body Oils, and Shock Schedules
A lounging area — especially one with a family of loungers clustered in the shallow end — gets an outsized load of sunscreen and body oils. People stay in one spot longer, skin contact is prolonged, and the accumulation is different from a lap pool where swimmers move around.
Factor this into your shock schedule. If you normally shock twice a week, you might add a third dose on high-use lounging days, or increase to a heavier dose per pound of water. Watch your alkalinity and pH around the lounging zone — oils and sunscreen can shift pH and alkalinity faster than you’d expect. Test more frequently if you’re noticing cloudiness in that area.
Algae Prevention in the Shallow End
Shallow water warms faster and holds sunlight longer, both of which create ideal conditions for algae growth. If you’re not already running your circulation system 24/7 during peak season, consider it once you have loungers in place. The shallow-end lounging area especially benefits from constant circulation. A still shallow pool is a green shallow pool in July.
Brush the area around loungers weekly — algae loves to start on surfaces adjacent to submerged furniture. And keep your chlorine levels on the slightly higher end of acceptable (2.5–3 ppm vs. 1.5–2.5 ppm) if you’re running high foot traffic in the shallow end.
Water Level Management
Loungers work best within a specific water-level range. If your pool level drops more than 3–4 inches below normal, loungers that are already near the shallow end might end up partially exposed, which defeats their purpose. If it gets too high, you might lose a few inches of the shallow lounging zone. Monitor your water level weekly during warm months and top off as needed. Most of your evaporation loss is normal (0.25 inches per day in hot, dry climates), but anything more than that suggests a leak.
The Bottom Line
If the budget and appetite exist for structural work, a real sun shelf is the better long-term answer — it adds property resale value that a piece of furniture never will. If you want to go that route, I’ve written a dedicated guide on how to retrofit a sun shelf into an existing pool, including permitting, cost breakdowns, and what to expect. For some pool owners, that 3- to 4-week project and $5,000–10,000 investment is worth it.
But for anyone who wants the lounging experience this season — without contractors, without draining the pool, without a 10-figure invoice, and without waiting months for construction — a quality in-pool ledge lounger delivers the same afternoon comfort and costs a fraction as much. The Tenjam Shayz in Pool Lounge Chairs checks every box: purpose-built submersion design, weighted and anti-float, UV-stable resin, good drainage, adjustable risers, and made-to-order colors. Unbox it, set it in your shallow end, and you’re lounging in your own DIY-friendly version of a sun shelf by this weekend.
That’s as close to a DIY pool sun shelf kit as the real world offers. And honestly? It’s better than searching for a product that doesn’t exist.
Affiliate Disclosure: This post contains affiliate links. As an Amazon Associate, I earn from qualifying purchases. If you buy something through my links, I may earn a small commission at no extra cost to you. I only recommend products I’ve actually used on the pools I manage.